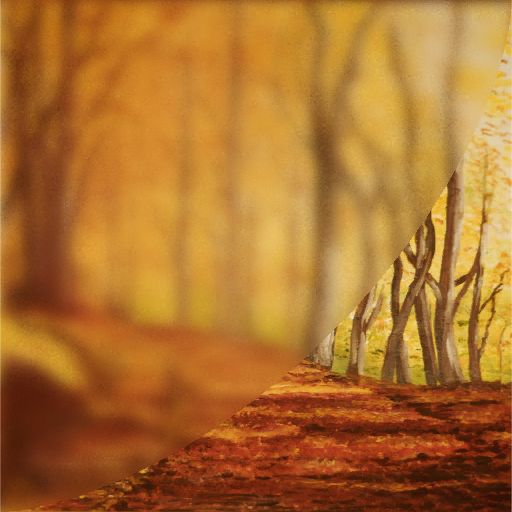
The painting in these images is one my grandmother painted, I should really encourage her to paint more...
 Documentation→Reference→Layers→Effects
 |
|
Effects allow you to change how a layer looks by bluring it, changing its colors, and a variety of other things. |
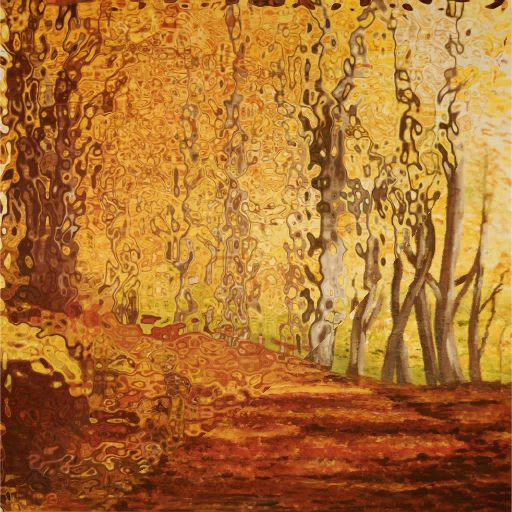
 Poisson(Disc) Blur Poisson(Disc) BlurBlurs by sampling in a disc around a point. This one can be rather expensive since it acts as if it duplicates the layer multiple times, however has multiple ways to optimize it. Separate - Separate the two blur axis or not. Blur X/Y - The width/height of the blur. Quality - The quality of the blur/the number of samples. Reduce Banding - Reduce the number of samples needed by applying noise to the sampling co-ordinates. Animate Noise - Animate the noise. Weighting - Use weighting? Factor - Change how much distant samples affect the final output - smaller the less, larger the more. Weighting Inverse - Inverts how it calculates the weighting. Tip: Is slower than Simple Blur, so try and keep as many other effects as possible after it. Tip: Mix with a simple blur to achieve larger blurs with less samples. |
|
 Simple Blur Simple BlurBlurs by using higher mip-maps. Higher mip-maps are smaller in resolution, and when scaled up create a blur. This effect is extremely fast, however it is limited and won't look as good as the Complex Blur. Blur - The mip-map level (Higher is blurrier). Note: Only works on Cubemaps and Textures. |
...pixelates the layer. Separate - Separate the two blur axis or not. Blur X/Y/Z - the size of each pixel. |
 Fractal Detail Fractal DetailDuplicates and scales the layer to add detail. Count - The number of copies. Scale - How much the layer is scaled each copy. Weighting - How much the layer's influence decreases each copy. |
 Antialias AntialiasThis effect attempts to correct aliasing artifacts such as sharp, flickering edges. Quality - The quality of the anti-aliasing/the number of samples. |
 Useless Blur Useless BlurUseless Blur tried to work how most other blur types work, by sampling around a point and averaging the values, however being a bad programmer I thoroughly stuffed it up. This one can be very expensive since it acts as if it duplicates the layer multiple times, and in a really stupid way. Separate - Separate the two blur axis or not. Blur X/Y - The width/height of the blur. Fast - Fast blur or not. Fast blur only samples points at 90 degree angles, while Slow blur samples diagonal angles too. Quality - The quality of the blur/the number of samples-ish * too much. Tip: Is slower than Simple Blur, so try and keep as many other effects as possible after it. Tip: Mix with a simple blur to achieve larger blurs with less samples. |
|
Color Effects
 Split SplitSplits the color components into seperate positions. Advanced - Allows access to individual color offsets. Factor - How much the colors are offset. R/G/B/A Vector - The individual color offsets. |
 Tint TintTints the layer. Color - The color to tint. |
 Contrast ContrastIncreases contrast by moving colors away from middle gray. Contrast - The amount of contrast. 0 is gray, 1 has no effect, and higher increases contrast. |
 Desaturate DesaturateDesaturate converts a color image to greyscale. It does this with weighted values for the colors (Red: 30%,Green: 59%,Blue: 11%), which is more pleasing to the eye. If you want the standard (r+g+b)/3, just apply a Maths/Dot effect (See below). |
 Hue Shift Hue ShiftAllows you to alter the Hue, Saturation and Value. Hue - The hue is the color, disregarding brightness and saturation. Saturation - Saturation is the "colorfulness", with 0 being greyscale. Value - Value is the darkness of the color. |
 Invert InvertInverts the color. |
 Swizzle SwizzleSwizzle allows you to switch the color components around. R/G/B/A - The component you want that component to be replaced with. |
 Threshold ThresholdThreshold makes any value under the threshold black. Threshold - The brightness threshold. |
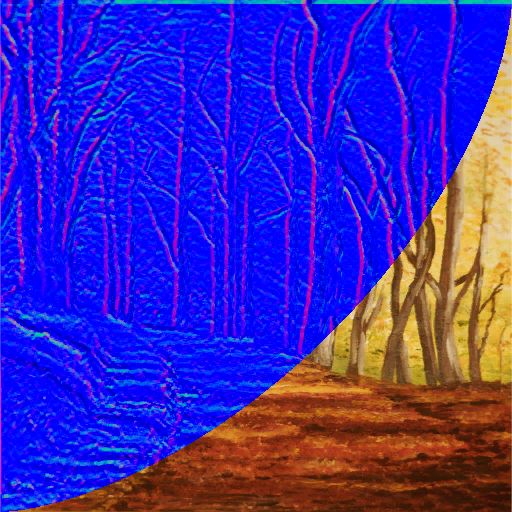 Height to Normals Height to NormalsConvert a height map (or any image) to a normal map. Size - The distance between the height samples. Height - The maximum height of the normal map. Channel - The channel from which the greyscale heightmap is from (Red,Green,Blue or Alpha). |
 Unpack Normals Unpack NormalsConverts a Unity texture that's marked as a normal map into a usable texture. |
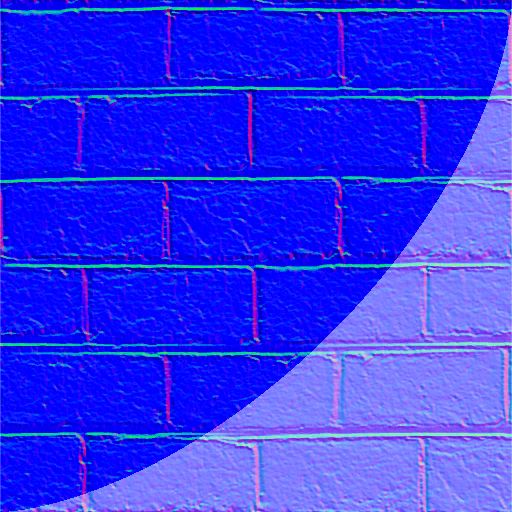
 Squish Normal Map Squish Normal MapConverts a usable normal map (The dark blue ones), into one that looks nicer. |
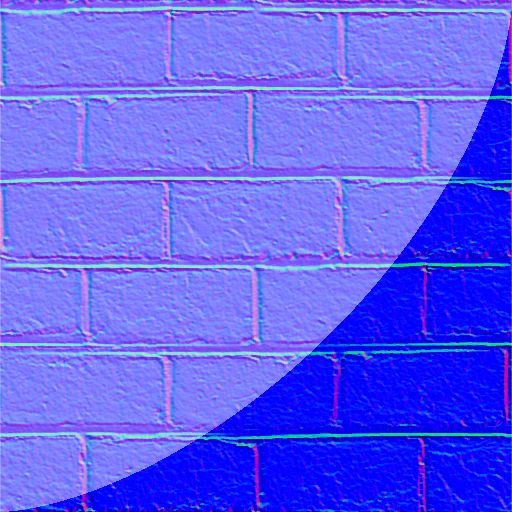
 Stretch Normal Map Stretch Normal MapConverts a normal map that has light blue color into one that's usable. |
 Absolute AbsoluteMakes all negative values positive (-5.4 becomes 5.4). |
 Add AddAdds an amount to all channels. Add - The amount to add. |
 Clamp ClampClamps the channels between a minimum and a maximum value. Min - The minimum amount, Lower values will be changed to this. Max - The maximum amount, Higher values will be changed to this. |
 Divide DivideDivides all channels by an amount. Divide - The amount to divide by. |
 Dot DotDots the channels with these values. With a being the layer's color, and b being the values, the dot product is a.x*b.x + a.y*b.y + a.z*b.z + a.w*b.w. R/G/B/A - The values to dot. |
 Frac FracReturns the fractional portion of a number (1.45 becomes .45). Split Number - The number to multiply the original number by (Creates splits). |
 Multiply MultiplyMultiplies an amount to all channels. Multiply - The amount to multiply by. |
 Power PowerRaises the channels to a power. Power - The power to raise to. |
 Round RoundRounds each of the channels. Split Number - The number to multiply the original number by (Creates splits). |
 Sine SineCalculates the sine of each channel. 0 - 1 - Choose whether it should return numbers between -1 and 1 (off), or 0 and 1 (on). |
 Subtract SubtractSubtracts an amount from all the channels. Subtract - The amount to subtract. |
 Distance DistanceCalculates the distance from the layer's color to the one specified. 1D/2D/3D/4D - How many axis it should take into account. X/Y/Z - The position to calculate distance from. |
 Mask Multiply Mask MultiplyMultiplies the layer by an RGBA mask's value. Values - The mask to multiply. |
 Stretch StretchStretches values from one range to another. From: Start/End - The original range. To: Start/End - The converted range. |
 Normalize NormalizeNormalizes (makes the length equal to 1) the vector defined by the layer's color. |
|
 Offset OffsetOffsets the mapping value, allowing scrolling textures for water and the like. Size - The distance between the height samples. X/Y/Z - The offset amount. |
 Scale ScaleAlters the mappings scale, for stretching textures or creating warping effects. Separate - Whether or not to scale uniformly or not. X/Y/Z - The offset amount. |
 Flip FlipFlips the layer in different directions. X/Y/Z - Which axis to flip. |
 Simple Rotate Simple RotateRotates the layer by a few set degrees. Fast, but limited. 0/90/180/270 - The amount to rotate around the Z axis. |
 Displace DisplaceDisplaces (adds to) the current mapping coordinates based on an RGBA mask. Displace Mask - The RGBA mask to use for displacement. Displace Amount - The amount to displace (multiplies with the mask) Displace Middle - The origin point of displacement values in the mask. For example a mask's value might go from 0-1 (meaning it would only distort in one direction), but you might want it to distort in both. By setting the middle to 0.5 it will distort both ways. |
|
 Set SetSets the mapping coordinates to an RGBA mask. Displace Mask - The RGBA mask to use for displacement. Scale - The scale of the mask (multiplies on). |
|
 Distance To Line Distance To LineCalculates the distance from the layer's color to the line specified. 1D/2D/3D/4D - How many axis it should take into account. Line Start/End - The start and end of the line. |