Get started with Shader Sandwich by recreating part of Unity's standard shader!
 Documentation→Manual→Beginner→Part 1 - Getting Started!
Hey there! Welcome to the first of the three part set of beginner tutorials that'll get you started with Shader Sandwich!
In this tutorial we're going to be recreating a small portion of Unity's standard shader - we'll have a texture slot, a color that changes the color of the texture, and a slider for the metallness.
Now before we get started I just want to cover how Shader Sandwich fits into Unity, and how shaders and materials work together to render(show) an object.
When rendering an object in Unity, you need a Material, however, the material itself doesn't do any rendering. It is simply a collection of settings such as textures, colors, numbers and cubemaps, that are then fed into the shader. The shader is what takes these settings - or inputs, as I'll refer to them throughout the rest of the tutorials - and then goes through every pixel the object is on, and calculates lighting, places the texture in the right spot, applys the color, etc.
So with that out of the way, let's create a shader!
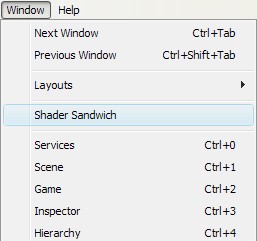 Open up Shader Sandwich by heading into the Window menu, and clicking it.
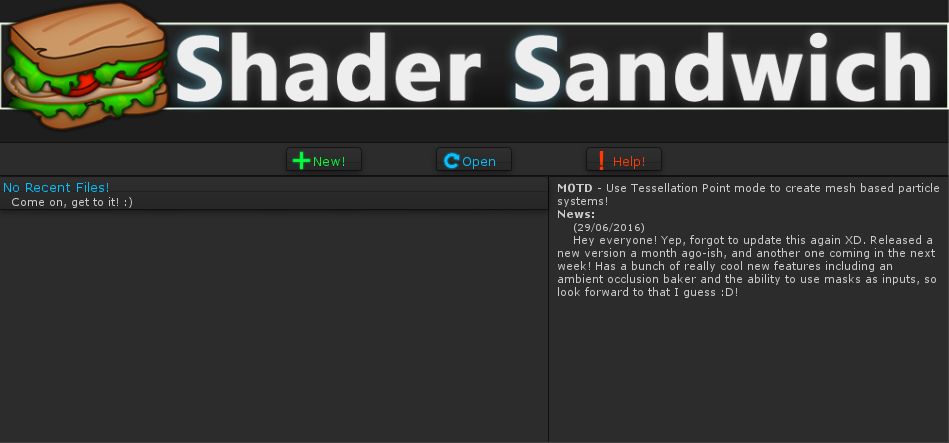
This is the opening screen, where you can create new shaders and see a bunch of other stuff. On the left you can see your recently opened files, which in your case is probably blank, and on the right you can see some news which is updated every so often. Alright, enough of this, let's begin!
Click New to create a new shader :)
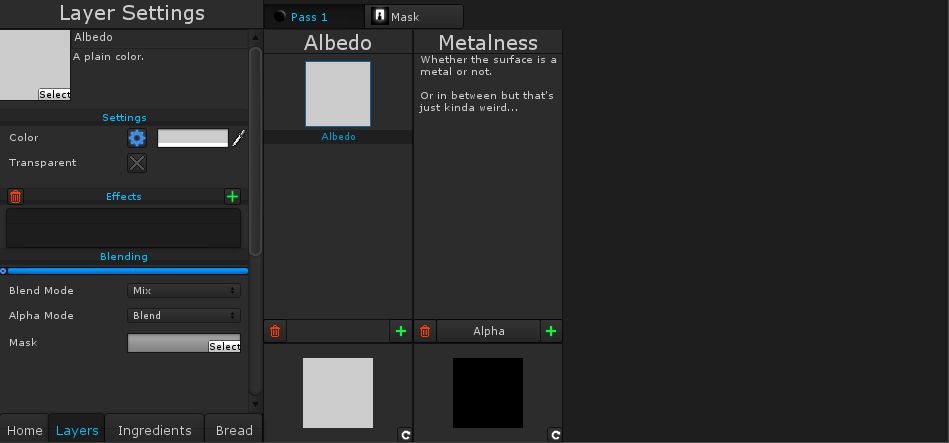
Welcome to the layers screen. You'll want to get familiar with this as the bulk of the shader will be made here. Shader Sandwich uses the concept of layers - such as colors or textures - that get wrapped around the object. This may not make sense immediately, but trust me, once we get started it'll become pretty intuitive.
On the left are the selected layer's settings, and then to the right of those are the layers themselves. Before we touch anything, we're going to open up a preview window which will let us see the shader as we make it. Click on the Previews menu item, then click on Open Preview Window.
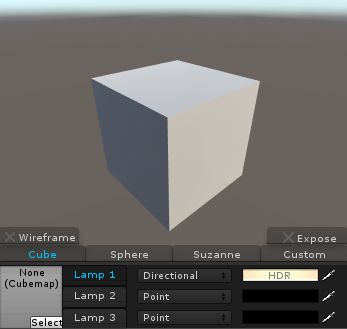
This is the preview window. Left clicking and dragging rotates the view, and right clicking and dragging zooms in and out.
Right at the bottom you can choose the ambient cubemap, and adjust lighting settings – these lights can be moved by holding down shift and using the same controls as the camera.
Just above these settings are those that allow you to choose the preview object, enable wireframe mode, and show the preview objects in the scene hierarchy.
Now, as a quick note, make sure to Never do what I say. Well, ok, you can, but be sure to mess around a bit. Use different colors, use different values, do whatever. Shader Sandwich is a very hands-on tool and it's best learned by playing around :).
Ok, well lets get into making the shader. To start off, we're gonna add a base color. To do this, we would normally have to add a layer; however Shader Sandwich starts off every new shader with a default color layer.
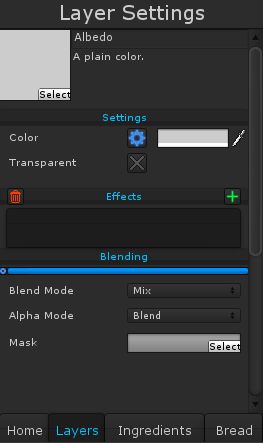 You can see its settings on the right – we'll be going into what each of these do over the next few tutorials, but for now let's focus on the top.
Here you can set the layer's name, and it's type – such as standard ones like Color or Texture, and more interesting ones like Cubist Noise or Depth.
Right underneath are the type settings, which allow you to change settings related to that layer type. For instance, I'm gonna go ahead and change the color setting.
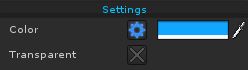
You'll notice the preview update and change color. In my case I've made mine a cool blue.
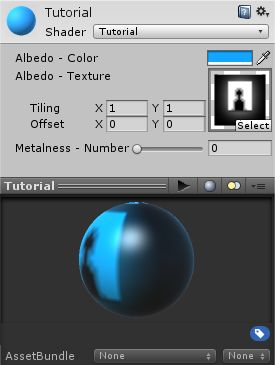
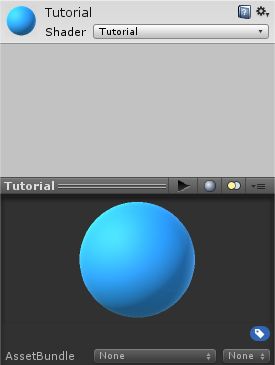
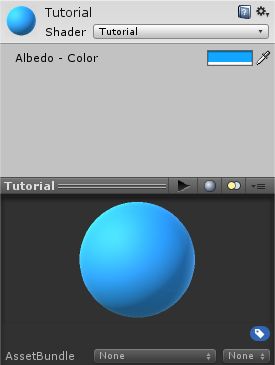
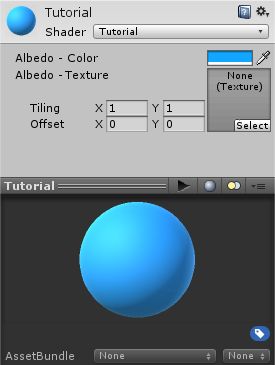
All right, well let's save the shader. Just click File, then Save As and call it whatever you want; I've called mine Tutorial 'cause I'm boring haha. Let's see what it looks like on a material. Add a new material and set its shader to what you called yours. The material will change to the color you selected, however there's no input to change it yet.
Doing this is pretty simple, we just have to tell Shader Sandwich to display the color in the editor.
 Next to the color setting, you'll see a blue gear. Clicking on it will bring up a miniature Inputs panel. By clicking the + button an input will be created and assigned to the Color setting (You can see more on Inputs here). Save now and you'll be able to change the color easily.
Alright, time to add the texture. Click the + button to add a new layer. It'll completely cover the other layer currently, but we'll fix that up in a second. For now, lets make it show a texture!
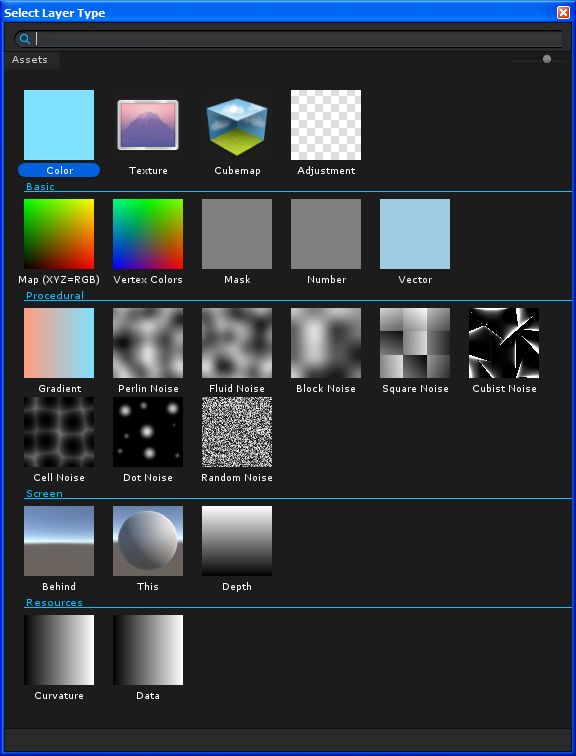 If we go back up to the top left of the layer settings and click select, it'll open up a panel where we can see all the layer types. Double click the Texture type, and the layer settings will change to allow you to select a texture.
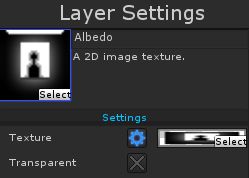 I've gone ahead and selected the little dude texture, but feel free to select something better. If you save now, you'll notice the material already has a texture input.
 Since it's impossible to "bake" a texture into a shader the same way you can a color, it'll automatically add one – however I'd reccomend you add an input the same way as the color, which'll allow you to change the input's settings (like name and default value). I've gone ahead and done that, and you'll see that the input has a different name (when automatically created it'll just be called Texture).
Now to get it to blend properly with the color underneath. To do this, we need to change how it blends; anyone who's used Gimp or Photoshop will understand blending modes, but I'll explain just in case.
When there's two different colors (For example, RGB(1, 0.4, 0.7) and RGB(0.2, 0, 0.6)) there are multiple ways to combine together. The standard way (Mix mode) just interpolates between them, so mid-way is RGB(0.6, 0.2, 0.65). Try dragging the blue bar (the Mix Amount) and see how it blends.
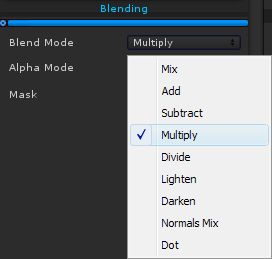 Mix isn't the blending mode we want though, we want the Multiply mode. This will multiply the two colors together; using the colors I mentioned above will end up with RGB(0.2, 0, 0.42). We can set the blend mode surprisingly in the blending section, so let's do that!
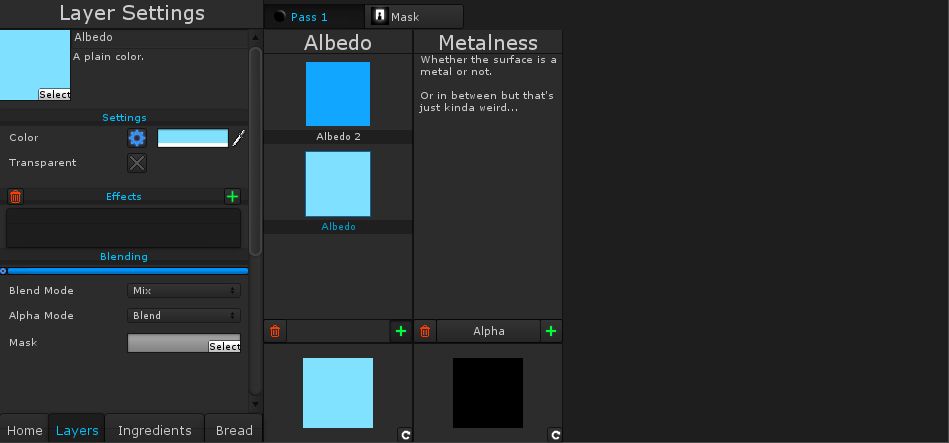
 Alright, we now have a texture that can have its color changed, cool! The only thing left to do now is to add the metalness setting. Let's go and add a layer to the Metalness layer channel.
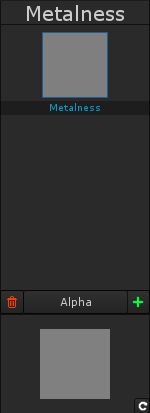
You'll notice that the new layer is a Number type, rather than a Color. This is because the Metalness channel only takes a single value (from 0 to 1), rather than a full range of colors.
You can see at the bottom of the layer channel is a drop down - currently set to Alpha - that can be used to set what color channel the layer channel takes its value from. In this case we don't need to worry about that though, since we can just use the Number layer type.
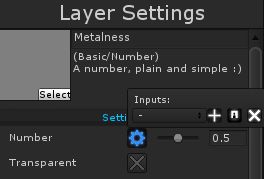 So finally let's add an input to the Number setting, and...that's it! :D
Well, the shaders done now! Just save it and you've got yourself your very own Diffuse shader. Not exciting enough? Well, head on over to the next tutorial then, where things get much more interesting!
In this tutorial we're going to be recreating a small portion of Unity's standard shader - we'll have a texture slot, a color that changes the color of the texture, and a slider for the metallness.
Now before we get started I just want to cover how Shader Sandwich fits into Unity, and how shaders and materials work together to render(show) an object.
When rendering an object in Unity, you need a Material, however, the material itself doesn't do any rendering. It is simply a collection of settings such as textures, colors, numbers and cubemaps, that are then fed into the shader. The shader is what takes these settings - or inputs, as I'll refer to them throughout the rest of the tutorials - and then goes through every pixel the object is on, and calculates lighting, places the texture in the right spot, applys the color, etc.
So with that out of the way, let's create a shader!
Open up Shader Sandwich by heading into the Window menu, and clicking it.
This is the opening screen, where you can create new shaders and see a bunch of other stuff. On the left you can see your recently opened files, which in your case is probably blank, and on the right you can see some news which is updated every so often. Alright, enough of this, let's begin!
Click New to create a new shader :)
Welcome to the layers screen. You'll want to get familiar with this as the bulk of the shader will be made here. Shader Sandwich uses the concept of layers - such as colors or textures - that get wrapped around the object. This may not make sense immediately, but trust me, once we get started it'll become pretty intuitive.
On the left are the selected layer's settings, and then to the right of those are the layers themselves. Before we touch anything, we're going to open up a preview window which will let us see the shader as we make it. Click on the Previews menu item, then click on Open Preview Window.
This is the preview window. Left clicking and dragging rotates the view, and right clicking and dragging zooms in and out.
Right at the bottom you can choose the ambient cubemap, and adjust lighting settings – these lights can be moved by holding down shift and using the same controls as the camera.
Just above these settings are those that allow you to choose the preview object, enable wireframe mode, and show the preview objects in the scene hierarchy.
Now, as a quick note, make sure to Never do what I say. Well, ok, you can, but be sure to mess around a bit. Use different colors, use different values, do whatever. Shader Sandwich is a very hands-on tool and it's best learned by playing around :).
Ok, well lets get into making the shader. To start off, we're gonna add a base color. To do this, we would normally have to add a layer; however Shader Sandwich starts off every new shader with a default color layer.
You can see its settings on the right – we'll be going into what each of these do over the next few tutorials, but for now let's focus on the top.Here you can set the layer's name, and it's type – such as standard ones like Color or Texture, and more interesting ones like Cubist Noise or Depth.
Right underneath are the type settings, which allow you to change settings related to that layer type. For instance, I'm gonna go ahead and change the color setting.
You'll notice the preview update and change color. In my case I've made mine a cool blue.
All right, well let's save the shader. Just click File, then Save As and call it whatever you want; I've called mine Tutorial 'cause I'm boring haha. Let's see what it looks like on a material. Add a new material and set its shader to what you called yours. The material will change to the color you selected, however there's no input to change it yet.
Doing this is pretty simple, we just have to tell Shader Sandwich to display the color in the editor.
Next to the color setting, you'll see a blue gear. Clicking on it will bring up a miniature Inputs panel. By clicking the + button an input will be created and assigned to the Color setting (You can see more on Inputs here). Save now and you'll be able to change the color easily.
Alright, time to add the texture. Click the + button to add a new layer. It'll completely cover the other layer currently, but we'll fix that up in a second. For now, lets make it show a texture!
If we go back up to the top left of the layer settings and click select, it'll open up a panel where we can see all the layer types. Double click the Texture type, and the layer settings will change to allow you to select a texture.
I've gone ahead and selected the little dude texture, but feel free to select something better. If you save now, you'll notice the material already has a texture input.
Since it's impossible to "bake" a texture into a shader the same way you can a color, it'll automatically add one – however I'd reccomend you add an input the same way as the color, which'll allow you to change the input's settings (like name and default value). I've gone ahead and done that, and you'll see that the input has a different name (when automatically created it'll just be called Texture).Now to get it to blend properly with the color underneath. To do this, we need to change how it blends; anyone who's used Gimp or Photoshop will understand blending modes, but I'll explain just in case.
When there's two different colors (For example, RGB(1, 0.4, 0.7) and RGB(0.2, 0, 0.6)) there are multiple ways to combine together. The standard way (Mix mode) just interpolates between them, so mid-way is RGB(0.6, 0.2, 0.65). Try dragging the blue bar (the Mix Amount) and see how it blends.
Mix isn't the blending mode we want though, we want the Multiply mode. This will multiply the two colors together; using the colors I mentioned above will end up with RGB(0.2, 0, 0.42). We can set the blend mode surprisingly in the blending section, so let's do that!
Alright, we now have a texture that can have its color changed, cool! The only thing left to do now is to add the metalness setting. Let's go and add a layer to the Metalness layer channel.You'll notice that the new layer is a Number type, rather than a Color. This is because the Metalness channel only takes a single value (from 0 to 1), rather than a full range of colors.
You can see at the bottom of the layer channel is a drop down - currently set to Alpha - that can be used to set what color channel the layer channel takes its value from. In this case we don't need to worry about that though, since we can just use the Number layer type.
So finally let's add an input to the Number setting, and...that's it! :D
Well, the shaders done now! Just save it and you've got yourself your very own Diffuse shader. Not exciting enough? Well, head on over to the next tutorial then, where things get much more interesting!