Originally Shader Sandwich was going to be based on nodes rather than layers, and be called Shader Noodle :P
 Documentation→Reference→Layers
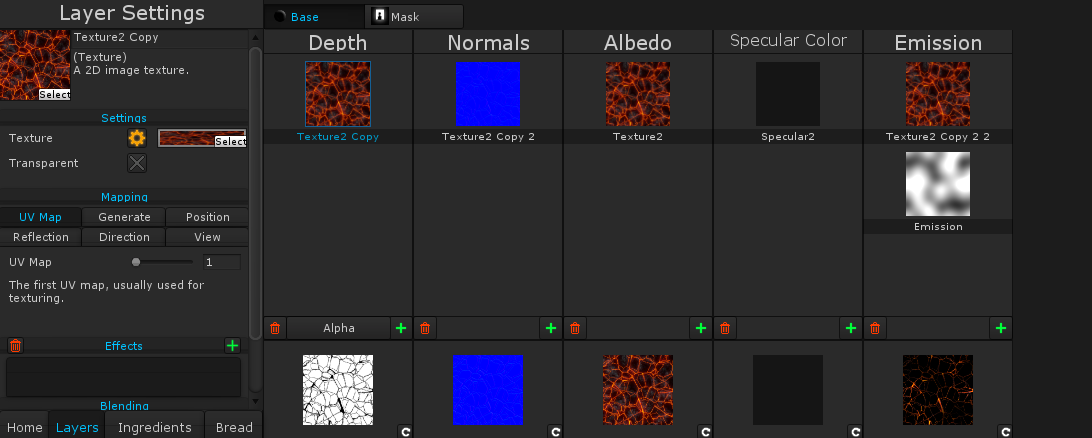
This is the Layers panel :)

On the left are the currently selected layer's settings (see below), and to the right are the layer channels themselves. Each of these layer channels belong to an ingredient, and are used to influence its settings like color and metalness. Just above the layer channels are buttons that allow you to select which shader pass or masks to be editing.
Layers can be created using the + button at the bottom of the layer channel, moved by clicking and dragging, and deleted by either dragging into empty space on the far right, into the bin, or by simply clicking the bin.
Some layer channels use all four color channels (Red, green, blue and alpha), while others use only RGB, or a single channel selectable at the bottom of the layer channel.

|
|
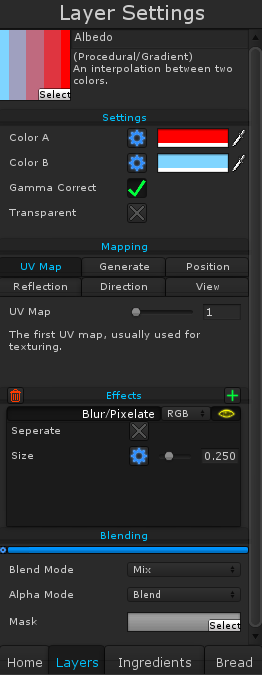
Base Settings - Its name, which is used when adding inputs; and its type, which defines how the layer looks, be it a color, a cubemap or a procedurally generated texture. See More |
|
Type settings - Settings specific to that layer type. Transparent sets whether or not the layer type's alpha channel is to be used, or simply set to fully opaque). See More |
|
Mapping - The mapping type defines how the shader chooses what parts of the layer are visible on what parts of the object. See More |
|
Effects - Effects allow you to change how a layer looks by bluring it, changing its colors, and a variety of other things. See More |
|
Blending - Blending affects how the layer is placed on the previous ones. See More |
Register!